Showing posts with label heat embossing. Show all posts

Tuesday, July 24, 2012

Praying For You Stampin' Up! Handmade Card

I needed to make a "Praying For You" card for some family members and decided to case one of Shelli Gardner's projects she shared with us at #Convention 2012.


Our family members have a young boy in the hospital for epilepsy.  They are going to try to remove the portion of brain where the epileptic seizures occur, at least that's my understanding of it.  I can't even imagine what they are going through and I feel quite helpless.  But I know I can pray, and I know prayers can be answered.
Here's a photo of the project Shelli shared.
Here are some photos of how the card was made:
Emboss the large chrysanthemum image from Betsy's Blossoms stamp Set using Versamark and clear embossing powder on Raspberry Ripple card stock.
 Heat set.
Punch out the flowers using the Blossom Punch.
Stack the flowers off set with Stampin' Dimensionals.

Use a glue dot to adhere the Primrose Petals Dahlia to the flower center.
Stamp the leaf image from Betsy's Blossoms stamp set using Versamark ink on Gumball Green card stock, emboss and heat set with clear embossing powder.
Cut out the embossed leaf images with Paper Snips.
Cut Whisper White card stock using the second to largest Labels Collection framelit die and the Big Shot.
Use the Elegant Lines embossing folder to emboss the die you just made.
Stamp the bird image 2 times on Whisper White card stock with Midnight Muse ink.  Cut out one full bird and one full wing.  Use a stampin' dimensional to add wing to bird for dimension.
The card base is Daffodil delight and the patterned paper is from Floral District designer series paper.  The sentiment is from Blessings From Heaven stamp set.
It's hard to know what to say in tough times like this, but hopefully, they'll know how much we care.  And we really want them to know that we're praying for them and their son.
Thanks for stopping by.  I'd love to hear from you.
Kelly
If you'd like to purchase the supplies used on this card, you may do that in my STAMPIN' UP! ONLINE STORE.
Supplies used on this card:
Stamp sets: Betsy's Blossoms (#126004 wood, #126006 clear mount), Blessings from Heaven (#123050 wood, 123052 clear mount)
Ink: Midnight Muse(#126860), VersaMark®(#102283)
Paper: Whisper white (#100730), Daffodil Delight(#119683), Raspberry Ripple(#126843), Gumball Green(#126840), Floral District (#126919)
Tools: Big shot (#113439), Elegant Lines embossing folder (#119277), Labels Collection framelits (#125598), Scallop Oval punch (#119856), Heat Tool (#129053), Paper Snips(103579), Bone Folder (#102300), SNAIL adhesive® (#104332), Stampin' Dimensionals®(#104430)
Accessories: Stampin' Emboss Powder® (#109130)

If you don't have a new catalog yet, buy one here and I'll send one out right away along with a lovely thank you card.
Stampin' Up! 2012-2013 Catalog $7.00 (no paypal account required to pay via paypal) Shipping via Priority 2-3 day mail.

Wednesday, June 27, 2012

Bordering On Romance Blender Pen and Marker Tutorial

Today I'd like to share with you in detail how to color with markers and a blender pen on Crumb Cake card stock.
This was my original card I made using this technique.
Here's a set of cards I have up for sale on Ebay right now.

Start by embossing your image in white on Crumb Cake card stock.
 Add your base color.  In this case I used Calypso Coral, Daffodil Delight, Blush Blossom and Lucky Limeade.  I used the brush tip end and if you click on the photo to get a larger view, you'll see it's kind of messy and there is color on the white embossing lines.  This will clean up later when you use your blender pen, and if it doesn't, you can give the image a light rub with a soft cloth or tissue to clean up the emobossing lines.
To show you the next step, I added color to an image that does not have base color.  I wanted you to see clearly where I added the next, darker color.  IMPORTANT: Do not add all of these lines at once.  Add them one at a time, blending each before you move on to the next section of your design.  I only added them all at once to this image so you could see all shading areas and how LITTLE you actually add.
 As you add each layer of darker color, use your blender pen to lightly color in small circles to blend and move color along edges of design as shown above.  When you blend each line as you add it, it will actually blend in much better than what you see above. The image above was blended after adding all the darker lines. Hopefully, you get the idea.
The next step is to add a outline of Sahara Sand marker around the outside edge of the entire design.  If you click on the image, you should be able to see a larger version of the photo.
Here's the completed image on a card.
I hope you enjoyed this tutorial.
You can purchase all the supplies needed to create your own cards and projects using this marker/blender pen technique in my online Stampin' Up! Store.


Thanks so much for stopping by!  I'd love to hear from you.  Please let me know if you have any questions or comments.  Take a look below to see all the "happenings".
Have a fabulous day!
Kelly
Do you have the new Stampin' Up! Idea Book and Catalog?  You can still get a FREE NEW CATALOG sent to you right away, with any order type (online, phone, email) of $50 or more until the end of JUNE 2012. Choose from new products, clearance rack, digital, anything!  Go online now, place your order, and get a free new catalog in the mail from me! You'll also earn your Rose Reward for your $50 order.

Thursday, June 14, 2012

Father's Day Card Idea with Stampin' Up! Varsity Alphabet

Looking for a fun Father's Day Card idea?
Father's Day Card Idea by Kelly Rose a.k.a. Roseyscrapper

The base is Not Quite Navy card stock. The background panel was made using the emboss resist technique.   I randomly stamped the leaf image from Day of Gratitude on a 4 x 5 1/4 panel of patterned paper with VersaMark® after rubbing with the embossing buddy. Generously sprinkle with clear embossing powder, shake off excess and heat emboss.
I wanted a small print pattern; I thought that would look more masculine.  This pattern is from the retired paper pack Well Worn (2011-2012).
I used a sponge to apply Not Quite Navy ink all over the paper making sure to get into all the detailed areas of the leaf images.  Then I rubbed, more randomly, some Early Espresso ink around the leaf images. Using a soft cloth I rubbed the ink off the stamped and embossed images. I spritzed the background panel with Gold Glow Smooch Spritz® I also sponged the edges of the card base with early espresso.
The letters were stamped in Not Quite Navy on Crumb Cake card stock, hand cut out with Paper Snips (the best for "fussy" cutting), then sponged the edges with early Espresso.  In the fine detailed line around the edge of the letters I added Gold Lame Smooch® Pearlized Accent Ink (retired).
I mounted the letters with Stampin' Dimensionals® on 1 3/8" Square Early Espresso punchies that had also been spritzed with Gold Glow Smooch Spritz®.  The ribbon is 3/8" Soft SuedeTaffeta Ribbon.
The inside sentiment "on a scale from one to ten YOU'RE AN 11", stamped on 4 x 5 1/4" Crumb Cake card stock, is from the retired hostess set Perfect Words (2011-2012).
You could do this card with all kinds of different color schemes, patterned paper, stamped images and letter stamps.  Have fun! And if I helped you out, let me know by leaving a comment!
Have a FABULOUS day!
Kelly
Do you have the new Stampin' Up! Idea Book and Catalog?  You can still get a FREE NEW CATALOG sent to you right away, with any order type (online, phone, email) of $50 or more until the end of JUNE 2012. Choose from new products, clearance rack, digital, anything!  Go online now, place your order, and get a free new catalog in the mail from me! You'll also earn your Rose Reward for your $50 order.
Supplies used on this card:
Stamp Sets:  Day of Gratitude (#120835 wood, #121148 clear mount), retired hostess set Perfect Words (2011-2012).
Ink: Not Quite Navy(#126970), Early Espresso (#126974), VersaMark® (#102283)
Paper:  Not Quite Navy(#100867), Early Espresso (#119686), Crumb Cake (#120953)Well Worn (retired 2011-2012)
Accessories:  3/8" Soft SuedeTaffeta Ribbon (#122967), Gold Glow Smooch Spritz® (#118770), Gold Lame Smooch® Pearlized Accent Ink (retired), Stampin' Emboss Power® Clear (#109130)
Tools:  Heat Tool (#129053), Embossing Buddy®(#103083), Stamping sponges (#101610), Stampin' Trimmer (#126889), Paper Snips(103579), Bone Folder (#102300), SNAIL adhesive® (#104332), Stampin' Dimensionals®(#104430)


Monday, April 9, 2012

Stampin' Up! Awash With Flowers Card


Two weekends ago, Shawn, J and I went to the 4th Avenue Street Fair here in Tucson.  It was so much fun sampling our way along the booths and being inspired by all the beautiful art work.  There were so many incredibly talented artists there. 
Shawn and I love wine and had fun tasting with one of the wineries at the fair .  We came home with a bottle of Kokopelli Sweet Lucy wine (visit their website HERE), and, in my typical fashion, I was inspired by the wine bottle label.  Here are the results of that inspiration.

I used the pewter embossing powder to emboss the flower and stem images from Awash with Flowers stamp set on Very Vanilla card stock.  Then I used Cajun Craze ink and an Aqua Painter to add a little color wash around the inside edges of the flowers and leaves.  Then I crinkled the paper slightly and started sponging on color.  The layering of color is what creates this “old world” look and gives the background great depth.  The order of colors was Crumb Cake, Soft Suede and Early Espresso.  Then I took the Aqua Painter and washed over each of the images and over most of the background just using plain water--no color added.  Adding that bit of water brings out all the different hues in the ink and creates a one of kind background. Finally, I spritzed the image and background paper with Black, Crumb Cake and Pool Party markers.
The sentiment, Inspire, was stamped using the Loving Thoughts stamp set from the Occasions Mini Catalog which is only available until April 30th, 2012.
Loving Thoughts Stamp set, available in wood, clearmount, and DIGITAL (instant download)!
Thanks for stopping by to take a look and let me know what you think of this technique or if you have any questions.  It was a lot of fun to do.
Till later,
Kelly
Supplies used:
Stamps:  Awash with Flowers (#117062 wood, #120549 clear mount), Loving Thoughts (#125843 wood, #125845 clear mount)
Ink:  Cajun Craze (#119671), Crumb Cake (#121030), Soft Suede (#115657), Early Espresso (#119670, VersaMark (#102283), StazOn Jet Black (#101406), In-Color Stampin Write markers (#123002), Basic Black marker (#100082), Crumb Cake marker (#120967)
Paper:  Very Vanilla (#101650), Cajun Craze (#119684), Basic Black (#121045)
Accessories and Tools:  Heat Tool (#100005), Powder Pals (#102197), Pewter Stampin Emboss Powder (#124114), Stampin' Sponges (#101610), Modern Label Punch (#119849), Big Shot (#113439), Movers and Shapers Punch Window Set (#115953), Movers and Shapers Curly Label (#114506), Pearls are non-Stampin' Up!, Color Spritzer Tool (#107066), Aqua Painter (#103954)

Saturday, April 7, 2012

Card Kit-Embossing with Mixed Bunch and Summer Smooches

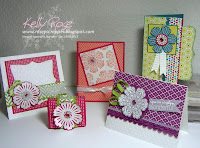
Embossing with Mixed Bunch and Summer Smooches Card Kit!
Offered by Kelly Rose www.roseyscrapper.blogspot.com
Price:  $21 includes shipping and paypal fees

Do you love to emboss but rarely take the time?  This kit is for you! 
Did you recently purchase the Mixed Bunch Stamp Set, but haven't used it yet?  This kit is for you!
Do you love creating cards with bling?  This kit is for you!
Do you simply love creating especially when most of the work is done for you?  This kit is for you!

Kit includes:  All card stock, vellum and designer series paper pre-cut and folder embossed and cut with the Big Shot to make the cards pictured in the above photo.  Kit also includes ribbon, brads, envelopes and die cut box.  Directions to complete each card with photos to assist in explaining some but not every step in the card completion are included.  Directions pdf can be purchased separately.  Directions pdf. are FREE to everyone who makes a $50 purchase during the month of April 1012, and will be sent automatically after your online purchase.  Directions pdf are available free to my downline.  Directions will be emailed to you within approximately 24 hours of your purchase.

What you will need to complete the cards as shown:  Heat embossing tool, white and iridescent ice stampin' emboss powders, Mixed bunch and Friendly phrases stamp sets, VersaMark ink, Tangerine Tango classic ink pad, Blossom Punch, Scallop Edge Border punch, Dotted Scallop Ribbon Border punch, scissors, Snail adhesive (or adhesive of your choice), Stampin' Dimensionals, piercing tool. 3/4" and 1" Circle punches optional.

No stamped images can be provided for you in compliance with Stampin' Up! copyright policy.  You can complete the projects with other stamps and coordinating punches or you can hand cut your stamped and embossed images.  Paper and vellum to stamp on will be provided in the kit.

Four kits are available right now and can be mailed on Monday, April 9, 2012.  Any kits ordered after the initial four will be mailed at the end of the next week.  I will keep you updated on delivery dates.

You do not have to have a PayPal account to use PayPal Buy Now check out.  You can use PayPal to process your credit and bank cards as a one time user.


To purchase Embossing with Mixed Bunch and Summer Smooches card kit click the Buy Now button and proceed to check out.
Kits will be mailed to US mainland customers only. 


To purchase the KIT INSTRUCTIONS ONLY in pdf file format to be emailed to you within approximately 24 hours of purchase, click the Buy Now button below and proceed to check out.


Thanks so much for stopping by and let me know if you have any questions about the kit!
Kelly

LinkWithin

Related Posts Plugin for WordPress, Blogger...