Showing posts with label #convention 2012. Show all posts

Saturday, July 28, 2012

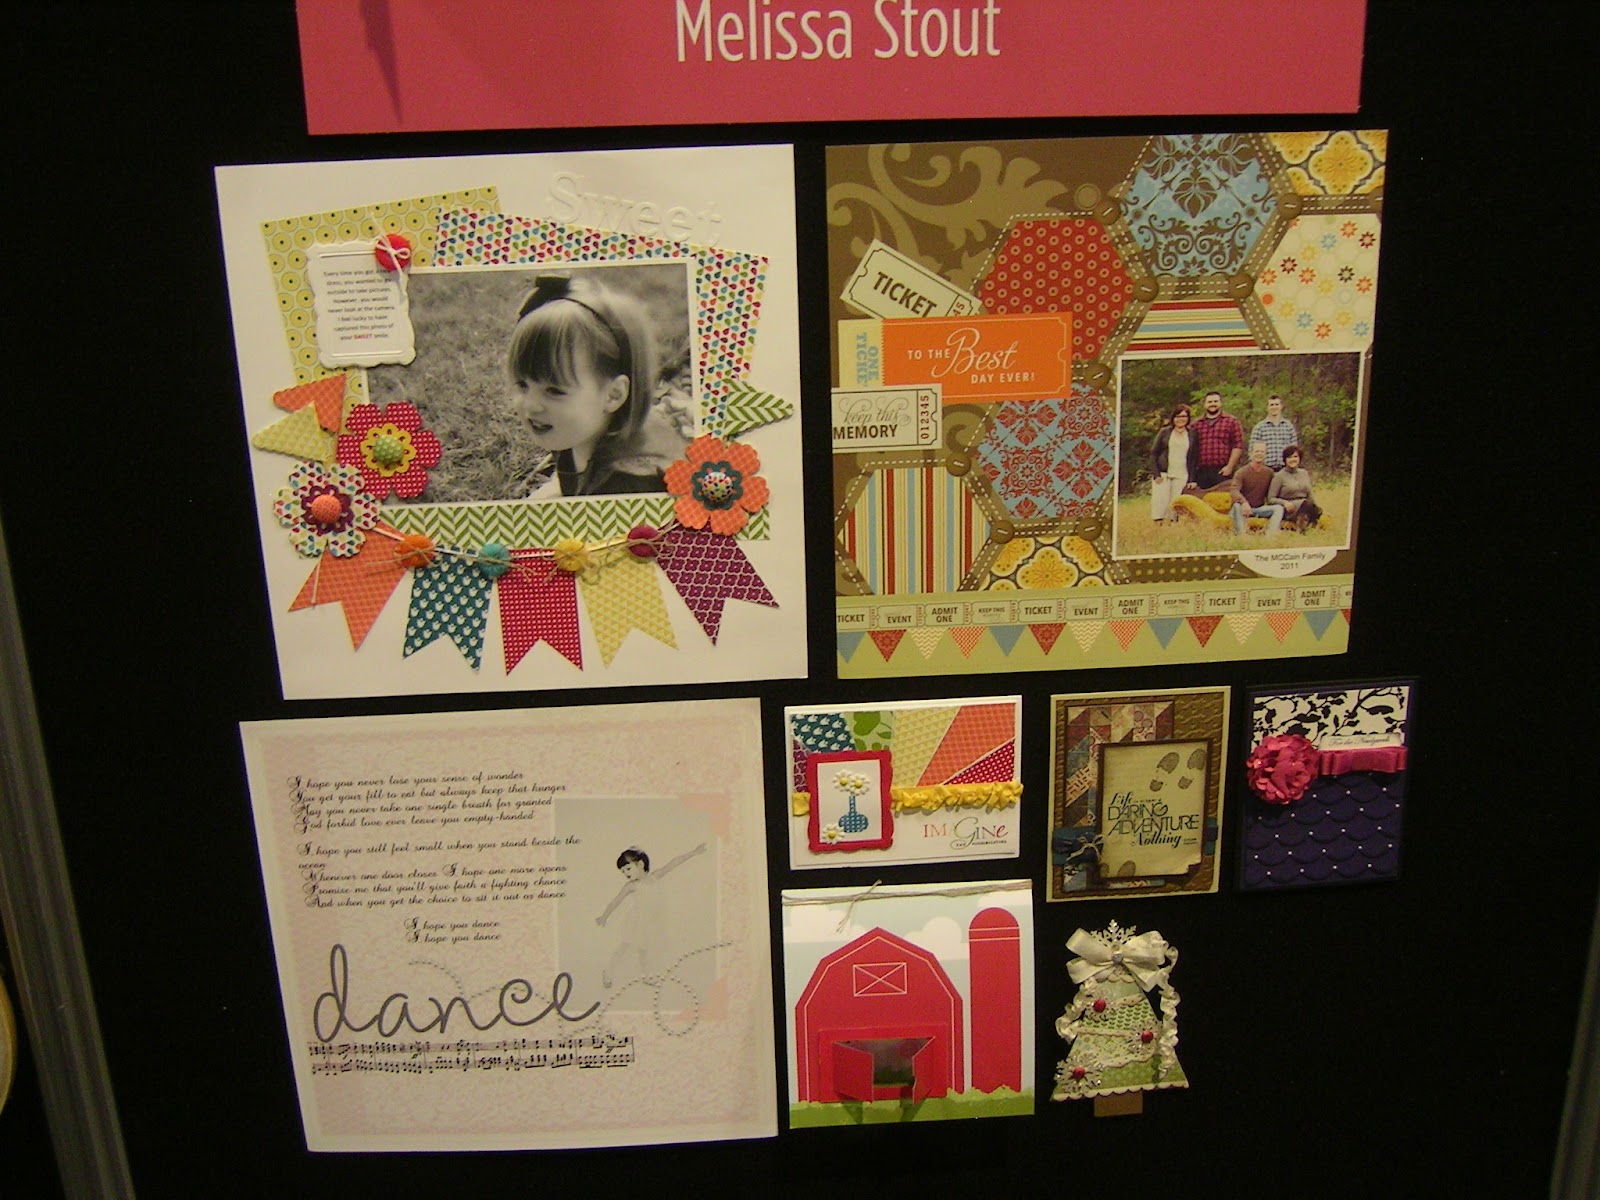
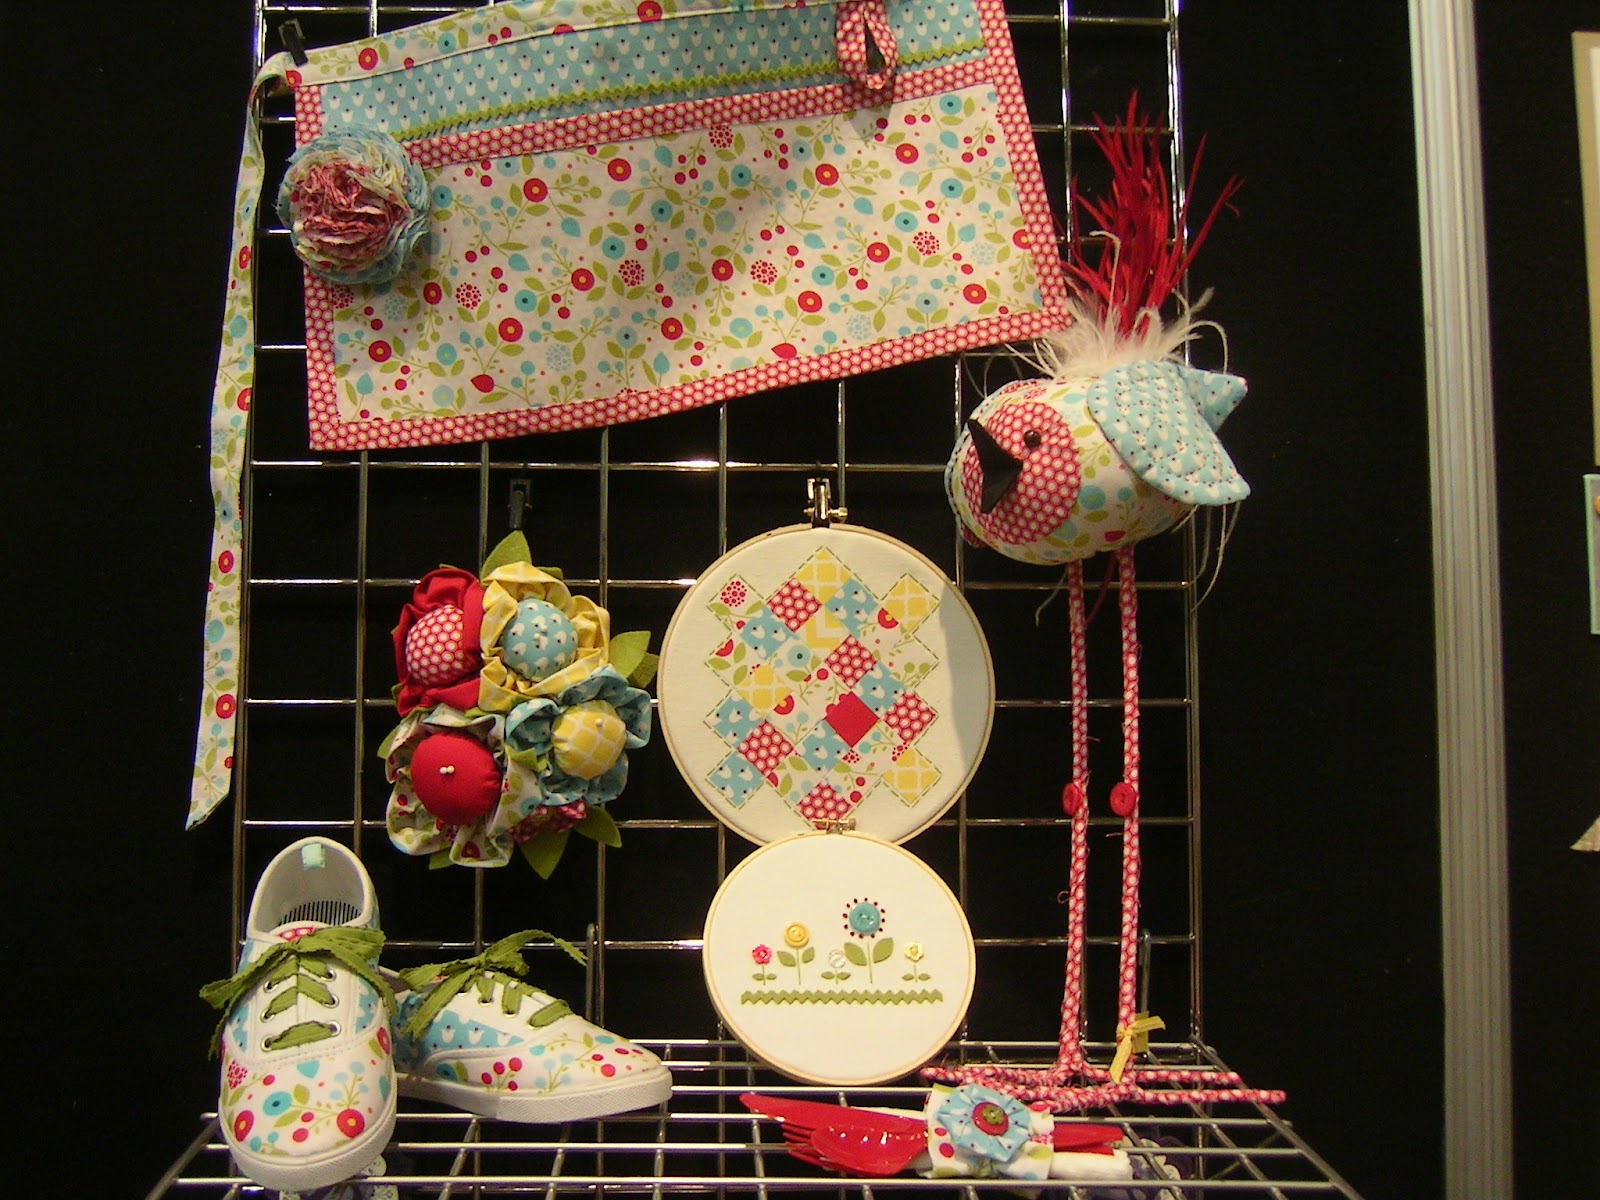
Stampin' Up! Convention 2012 Display Board photos

How about some convention photos? One of the great pleasures of attending a Stampin' Up! event is seeing all the amazing projects created by all our amazing demonstrators and artists. Enjoy!
Stampin' Up! Convention 2012 Display boards

Stampin' Up! Convention 2012 Display boards

Stampin' Up! Convention 2012 Display boards

Stampin' Up! Convention 2012 Display boards

Stampin' Up! Convention 2012 Display boards

Stampin' Up! Convention 2012 Display boards

Stampin' Up! Convention 2012 Display boards

Stampin' Up! Convention 2012 Display boards

Stampin' Up! Convention 2012 Display boards

Stampin' Up! Convention 2012 Display boards

Stampin' Up! Convention 2012 Display boards

Stampin' Up! Convention 2012 Display boards

Stampin' Up! Convention 2012 Display boards

Stampin' Up! Convention 2012 Display boards

Stampin' Up! Convention 2012 Display boards

Stampin' Up! Convention 2012 Display boards

Stampin' Up! Convention 2012 Display boards

Stampin' Up! Convention 2012 Display boards

Stampin' Up! Convention 2012 Display boards

Stampin' Up! Convention 2012 Display boards

You can click on any of the photos to see a larger view. I'm not a very good photographer and my camera is really old and crappy, but I think you can get the idea of how awesome the display boards are.  I wanted to take so many of these projects home with me!  Guess I better get started CASEing!

If you have questions about any of these projects or products, please don't hesitate to ask me! My number one job as a demonstrator is to help others create. And I love doing just that.

May God bless you abundantly,
Kelly


If you don't have a new catalog yet, you can buy one here and I'll send one out right away along with a lovely thank you card.
Stampin' Up! 2012-2013 Catalog $7.00 (no paypal account required to pay via paypal) Shipping via Priority 2-3 day mail.

Thursday, July 26, 2012

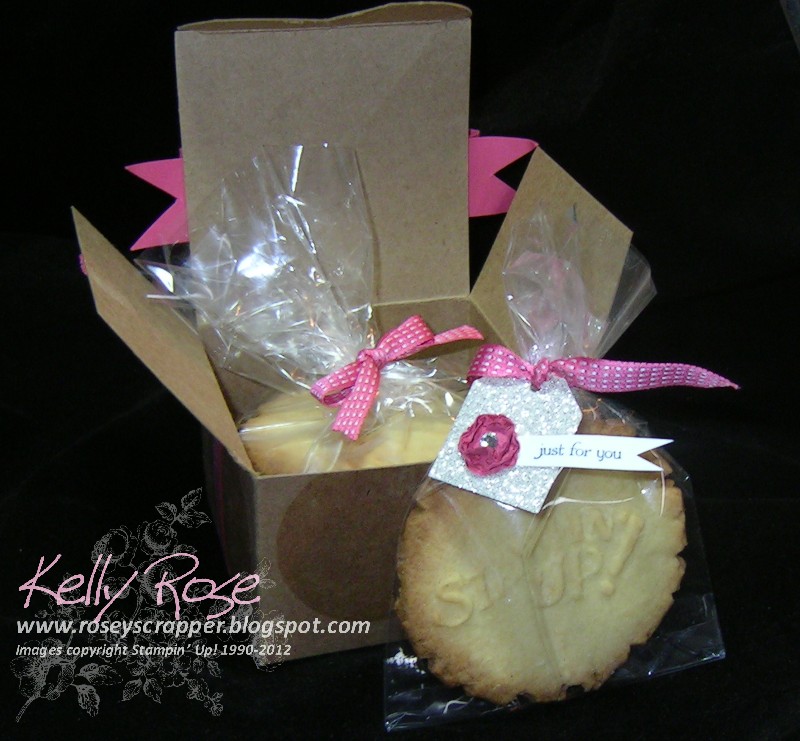
Sweet Pressed Cookie Stamps Box and cello Bag Stampin' Up!

As promised, here are a few more details on yesterday's box of Sweet Pressed Cookies box and bag.
The box is actually one of our Make n Takes from #Convention 2012 and those circles that have been stamped on the box in VersaMark® are the centers of the Daydream Medallions stamp set (#126465 wood, 126467 clear mount).
If you'd like to open and close your box without removing the wrapping, you can attach the ribbon as you see I've done in the photo above.
To create the tag, stamp 3 of the smallest medallions from the Daydream Medallion set in Primrose petals ink on Primrose petals card stock. Punch out with the 3/4 inch punch.  This is only to make cutting them out easier.
Then crumple them up and stack using mini glue dots.
Add a large rhinestone to the center.  Punch a tag from silver glimmer paper. IS THIS STUFF NOT THE GREATEST STUFF IN THE WORLD!!!??? THE SPARKLE, OH THE SPARKLE!  (You know you want some NOW...so I'm making it easy on you...click this link to buy it).

Stamp your greeting using Midnight Muse ink on Whisper White then hand cut the flag.  It will not matter if it's straight...it's a flag....blowing in the wind.....You get the idea.  Punch a small hole in the top of your flag and tie it onto your cookie bag. Voila!
If you would like to purchase the supplies used in these cookie packaging ideas, just VISIT MY ONLINE STORE and type in the product numbers listed below in the search bar.  (When you shop in my online store you get preferred prices and discount shipping, you can also qualify to get hostess benefits when you spend $150 or more) You can get everything you see here except the cookies. However, you can get your own cookie stamps that come with this very excellent sugar cookie recipe and make your own.  See yesterday's post for my tips on making stamped cookies.  Your friends and family will love you even more for it!
May God bless you abundantly,
Kelly

Supplies used:  
Stamp sets:  Daydream Medallions (#126465 wood, 126467 clear mount), Teeny Tiny Wishes (#115370 wood, #127802 clear mount)
Ink: Midnight Muse(#126860), VersaMark®(#102283), Primrose Petals (#126858)
Paper:  Whisper white (#100730), Primrose Petals (#126841), Silver Glimmer Paper (#124005)
Tools: Extra-large tag punch (#119866), Paper Snips (#103579)
Accessories:  Primrose Petals stitched ribbon (#126844), 4"x6" Cellophane bags (50 per pkg) (#102757), Kraft Gift boxes (set of 4) (#124106), Rhinestone basic jewels (#119246), Vintage Faceted Designer Buttons (24) (#127555)

If you don't have a new catalog yet, you can buy one here and I'll send one out right away along with a lovely thank you card.
Stampin' Up! 2012-2013 Catalog $7.00 (no paypal account required to pay via paypal) Shipping via Priority 2-3 day mail.


Wednesday, July 25, 2012

Sweet Pressed Cookie Stamps by Stampin' Up!

Memento Mall was one of the perks at #Convention 2012 and although I've made tons of these cookies and have thoroughly enjoyed giving them as gifts, I don' think I've ever posted about them on my blog.  So I created this pictorial to show you how I do it.
Above is a photo of the new Sweet Press cookie stamps I was able to pick up at #Convention 2012 Memento Mall. Click the links in my supplies list below to see the sets available to my customers.
I like the Sugared Cookie recipe included with stamps.  It's an excellent recipe.  Then I use my Pampered Chef cookie scoop for my dough balls. 
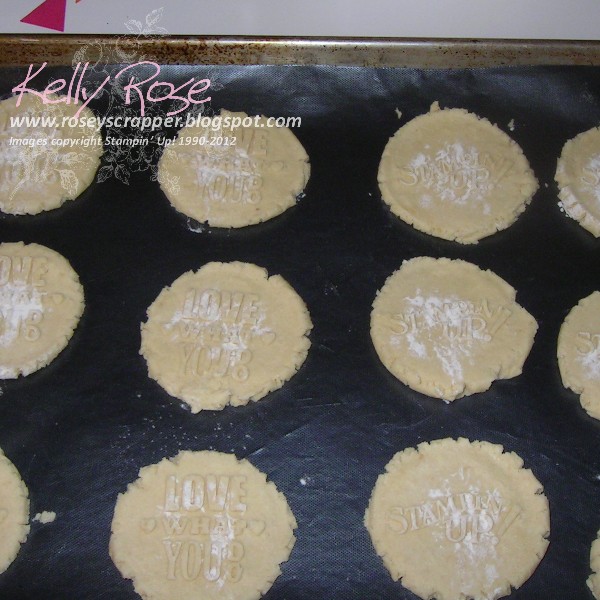
Then I like to dip my perfect little cookie balls, that I didn't have to roll in my hands to make, in a little bit of flour to keep the cookie mix from sticking to the stamp because I don't like to wait the 30 minute refrigeration time.

Choose your stamp, add it to the wooden handle, and press down evenly (the evenly part is a bit of a challenge for me).

 A pan full of adorable cookies ready for the oven.  The stamps say Stampin' Up! and Love What You Do. (And I do, love what I do).  I don't have all the headaches of owning a bakery and yet I get to make cookies when I'm "working".
And out of the oven.  If you can't see the press designs, click on the photo for a larger view. They're really cute.  That first batch baked a little longer.  I'm still adjusting to my oven.
Oops! Guess I'll have to "destroy" the evidence.
I suppose now you want to see how I package them?
I'll be back later with some how to's and tips on these packaging ideas. This post is already too long.
Thanks for stopping by, and may God bless you abundantly!
Kelly

Supplies used:
Stamps: (Available-click the links to see the sets)  Holidays Sweet Pressed Cookie Stamps (#125152), Occasions Sweet Pressed Cookie Stamps (#127081), Special Events Sweet Pressed Cookie Stamps (#126903)
If you don't have a new catalog yet, buy one here and I'll send one out right away along with a lovely thank you card.
Stampin' Up! 2012-2013 Catalog $7.00 (no paypal account required to pay via paypal) Shipping via Priority 2-3 day mail.


Tuesday, July 24, 2012

Praying For You Stampin' Up! Handmade Card

I needed to make a "Praying For You" card for some family members and decided to case one of Shelli Gardner's projects she shared with us at #Convention 2012.


Our family members have a young boy in the hospital for epilepsy.  They are going to try to remove the portion of brain where the epileptic seizures occur, at least that's my understanding of it.  I can't even imagine what they are going through and I feel quite helpless.  But I know I can pray, and I know prayers can be answered.
Here's a photo of the project Shelli shared.
Here are some photos of how the card was made:
Emboss the large chrysanthemum image from Betsy's Blossoms stamp Set using Versamark and clear embossing powder on Raspberry Ripple card stock.
 Heat set.
Punch out the flowers using the Blossom Punch.
Stack the flowers off set with Stampin' Dimensionals.

Use a glue dot to adhere the Primrose Petals Dahlia to the flower center.
Stamp the leaf image from Betsy's Blossoms stamp set using Versamark ink on Gumball Green card stock, emboss and heat set with clear embossing powder.
Cut out the embossed leaf images with Paper Snips.
Cut Whisper White card stock using the second to largest Labels Collection framelit die and the Big Shot.
Use the Elegant Lines embossing folder to emboss the die you just made.
Stamp the bird image 2 times on Whisper White card stock with Midnight Muse ink.  Cut out one full bird and one full wing.  Use a stampin' dimensional to add wing to bird for dimension.
The card base is Daffodil delight and the patterned paper is from Floral District designer series paper.  The sentiment is from Blessings From Heaven stamp set.
It's hard to know what to say in tough times like this, but hopefully, they'll know how much we care.  And we really want them to know that we're praying for them and their son.
Thanks for stopping by.  I'd love to hear from you.
Kelly
If you'd like to purchase the supplies used on this card, you may do that in my STAMPIN' UP! ONLINE STORE.
Supplies used on this card:
Stamp sets: Betsy's Blossoms (#126004 wood, #126006 clear mount), Blessings from Heaven (#123050 wood, 123052 clear mount)
Ink: Midnight Muse(#126860), VersaMark®(#102283)
Paper: Whisper white (#100730), Daffodil Delight(#119683), Raspberry Ripple(#126843), Gumball Green(#126840), Floral District (#126919)
Tools: Big shot (#113439), Elegant Lines embossing folder (#119277), Labels Collection framelits (#125598), Scallop Oval punch (#119856), Heat Tool (#129053), Paper Snips(103579), Bone Folder (#102300), SNAIL adhesive® (#104332), Stampin' Dimensionals®(#104430)
Accessories: Stampin' Emboss Powder® (#109130)

If you don't have a new catalog yet, buy one here and I'll send one out right away along with a lovely thank you card.
Stampin' Up! 2012-2013 Catalog $7.00 (no paypal account required to pay via paypal) Shipping via Priority 2-3 day mail.

LinkWithin

Related Posts Plugin for WordPress, Blogger...